
If you’re staring at your child's small bedroom, wondering how on earth you're going to fit a bed, a desk, and some room to play, you're not alone. This is where the brilliant IKEA loft bed hack comes in. It's a fantastic way to take a standard piece of furniture and turn it into a multi-functional space that really works for your family.
This isn't just about saving a bit of floor space; it’s about creating proper, dedicated zones for sleep, study, and play, all within a single footprint.
Unlock Your Kid's Room Potential with an Ikea Loft Bed Hack
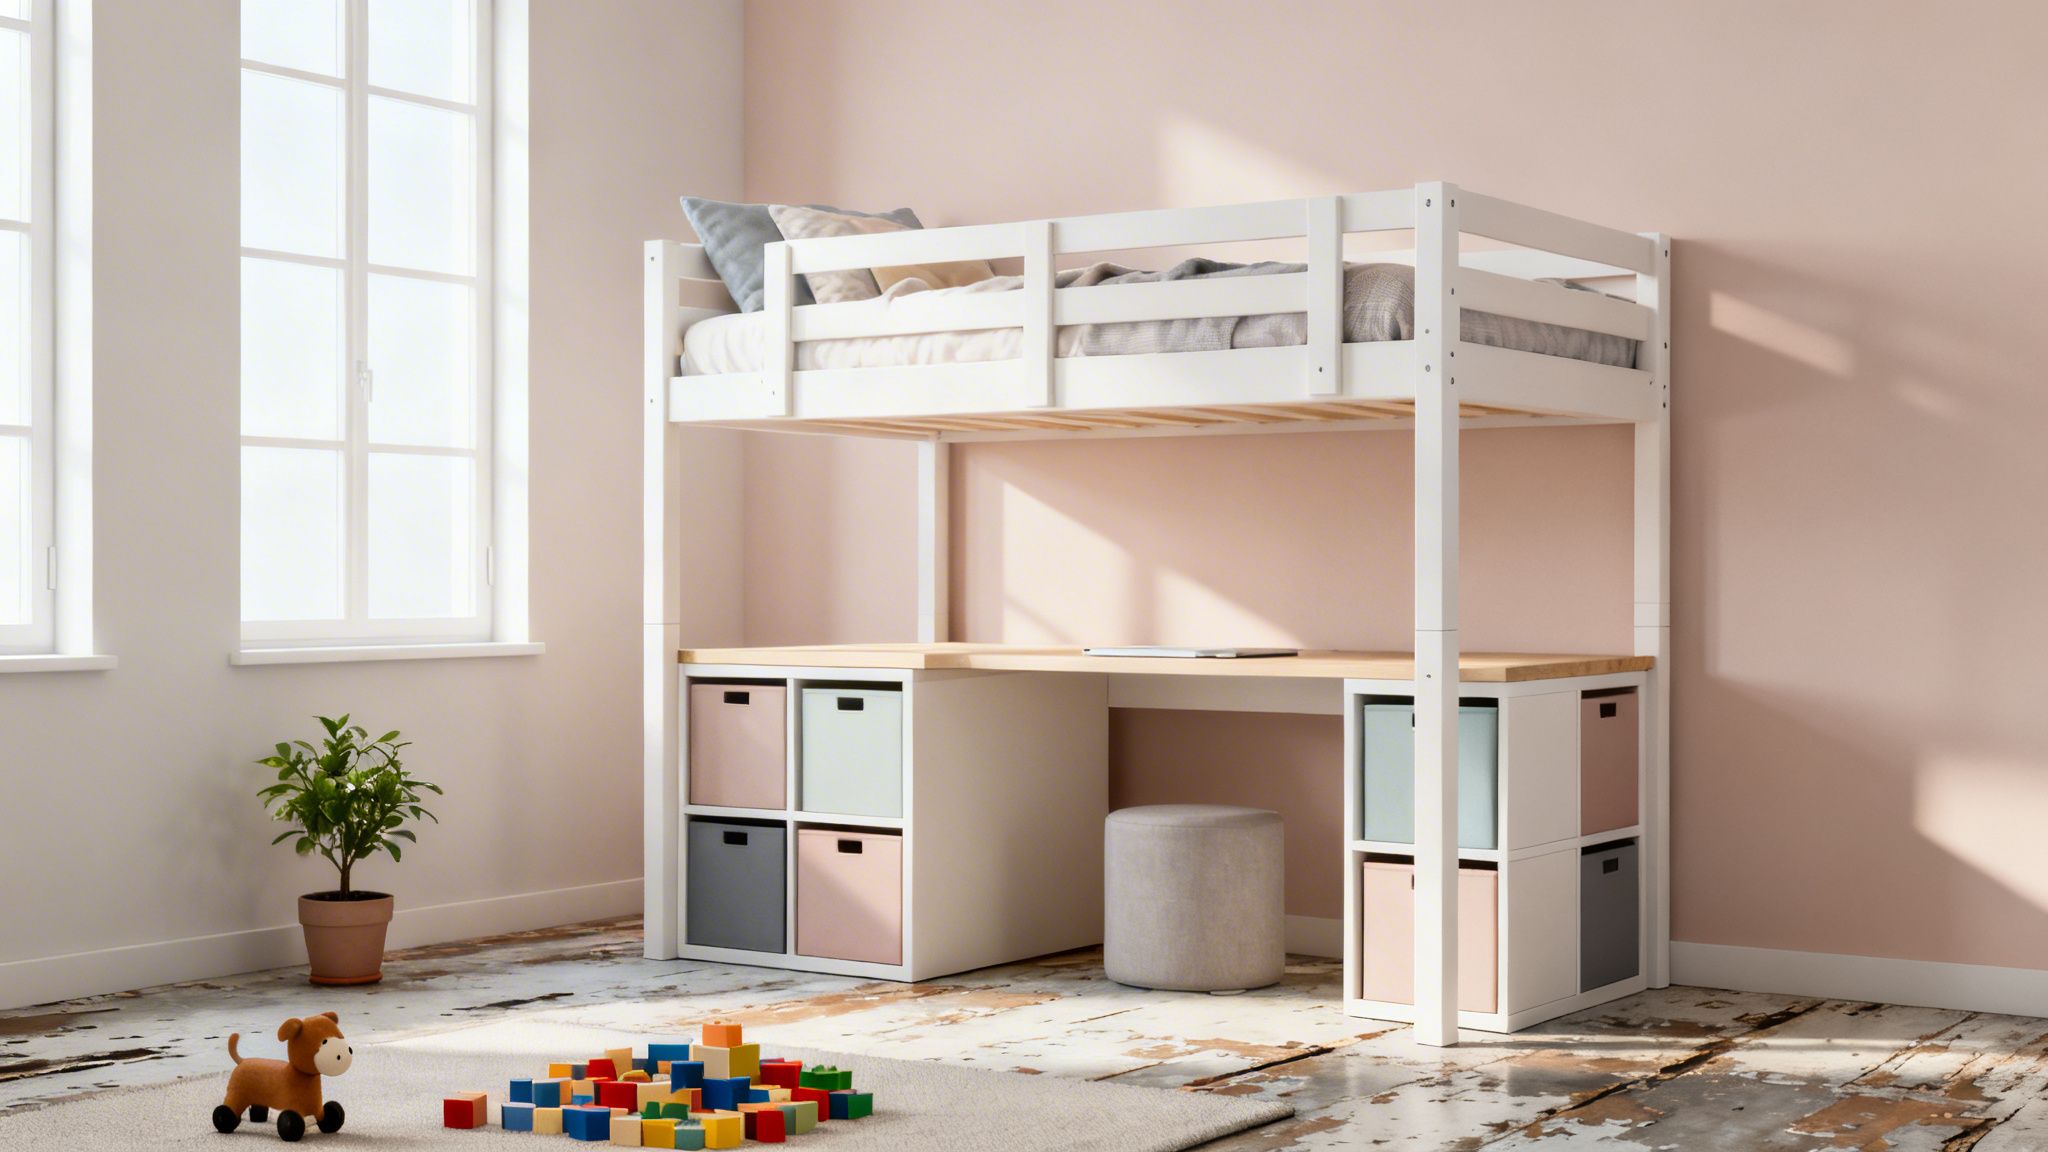
So, what exactly is an IKEA loft bed hack? It’s simply the clever art of customising a standard loft bed to perfectly match what your family needs. Think of popular models like the SVÄRTA, SMÅSTAD, or KURA not as finished products, but as a blank canvas for your creativity.
These projects can be as simple or as ambitious as you like. A simple example would be attaching a £10 DIGNITET curtain wire and some old bedsheets to the KURA bed to create a den. An ambitious example might involve building a full desk, wardrobe, and shelving unit under the SMÅSTAD bed using pieces from the same system. The goal is always the same: to make every single centimetre of the room count.
Why Are These Hacks So Popular in the UK?
Especially here in the UK, where our homes are often on the cosier side, we’ve had to get pretty good at smart, space-saving solutions. This trend is a perfect example of that ingenuity. With the UK home furniture market projected to hit £15.17 billion by 2026, it's clear that clever, multi-use furniture is a huge driving force. You can dive deeper into these UK furniture market trends on Mordor Intelligence.
It's not just a style choice; it makes real financial sense. A 2025 survey found that 42% of parents under 40 had already hacked a budget-friendly loft bed to create a study nook. For example, by combining a £179 SVÄRTA loft bed with a £35 LINNMON tabletop, they created a full sleep-and-study station for under £220. By doing so, they saved an estimated £200-£400 compared to buying a pre-built custom setup. An IKEA hack puts you in control, letting you build exactly what you need for a fraction of the cost.
More Than Just a Bed
The benefits of transforming a simple loft bed go far beyond just having somewhere to sleep. You’re creating an organised, inspiring environment that can easily adapt as your child gets older.
- Reclaiming Floor Space: Lifting the bed immediately opens up the floor. Suddenly, there’s room for a playmat, a cosy reading corner, or just more space to move without tripping over things.
- Creating Dedicated Zones: You can build a proper homework station under the bed, keeping it separate from the main play area. For example, the desk is for homework, while the other side of the room with the rug and toy box is for play. This helps children focus by creating clear boundaries for different activities.
- Adding Personalised Storage: This is where hacks really shine. You can add storage that’s a perfect fit for your child's belongings. For instance, you could fit a KALLAX 2x2 unit under one end of the loft bed to create perfect cubbies for toys like our TidyCubs storage cubes, keeping everything tidy and within easy reach.
By hacking an IKEA loft bed, you're not just assembling furniture. You’re designing a custom solution that addresses your child's specific needs, your home's spatial constraints, and your family's budget. It's about turning a limitation—a small room—into a creative opportunity.
Designing Your Dream Loft Bed Transformation
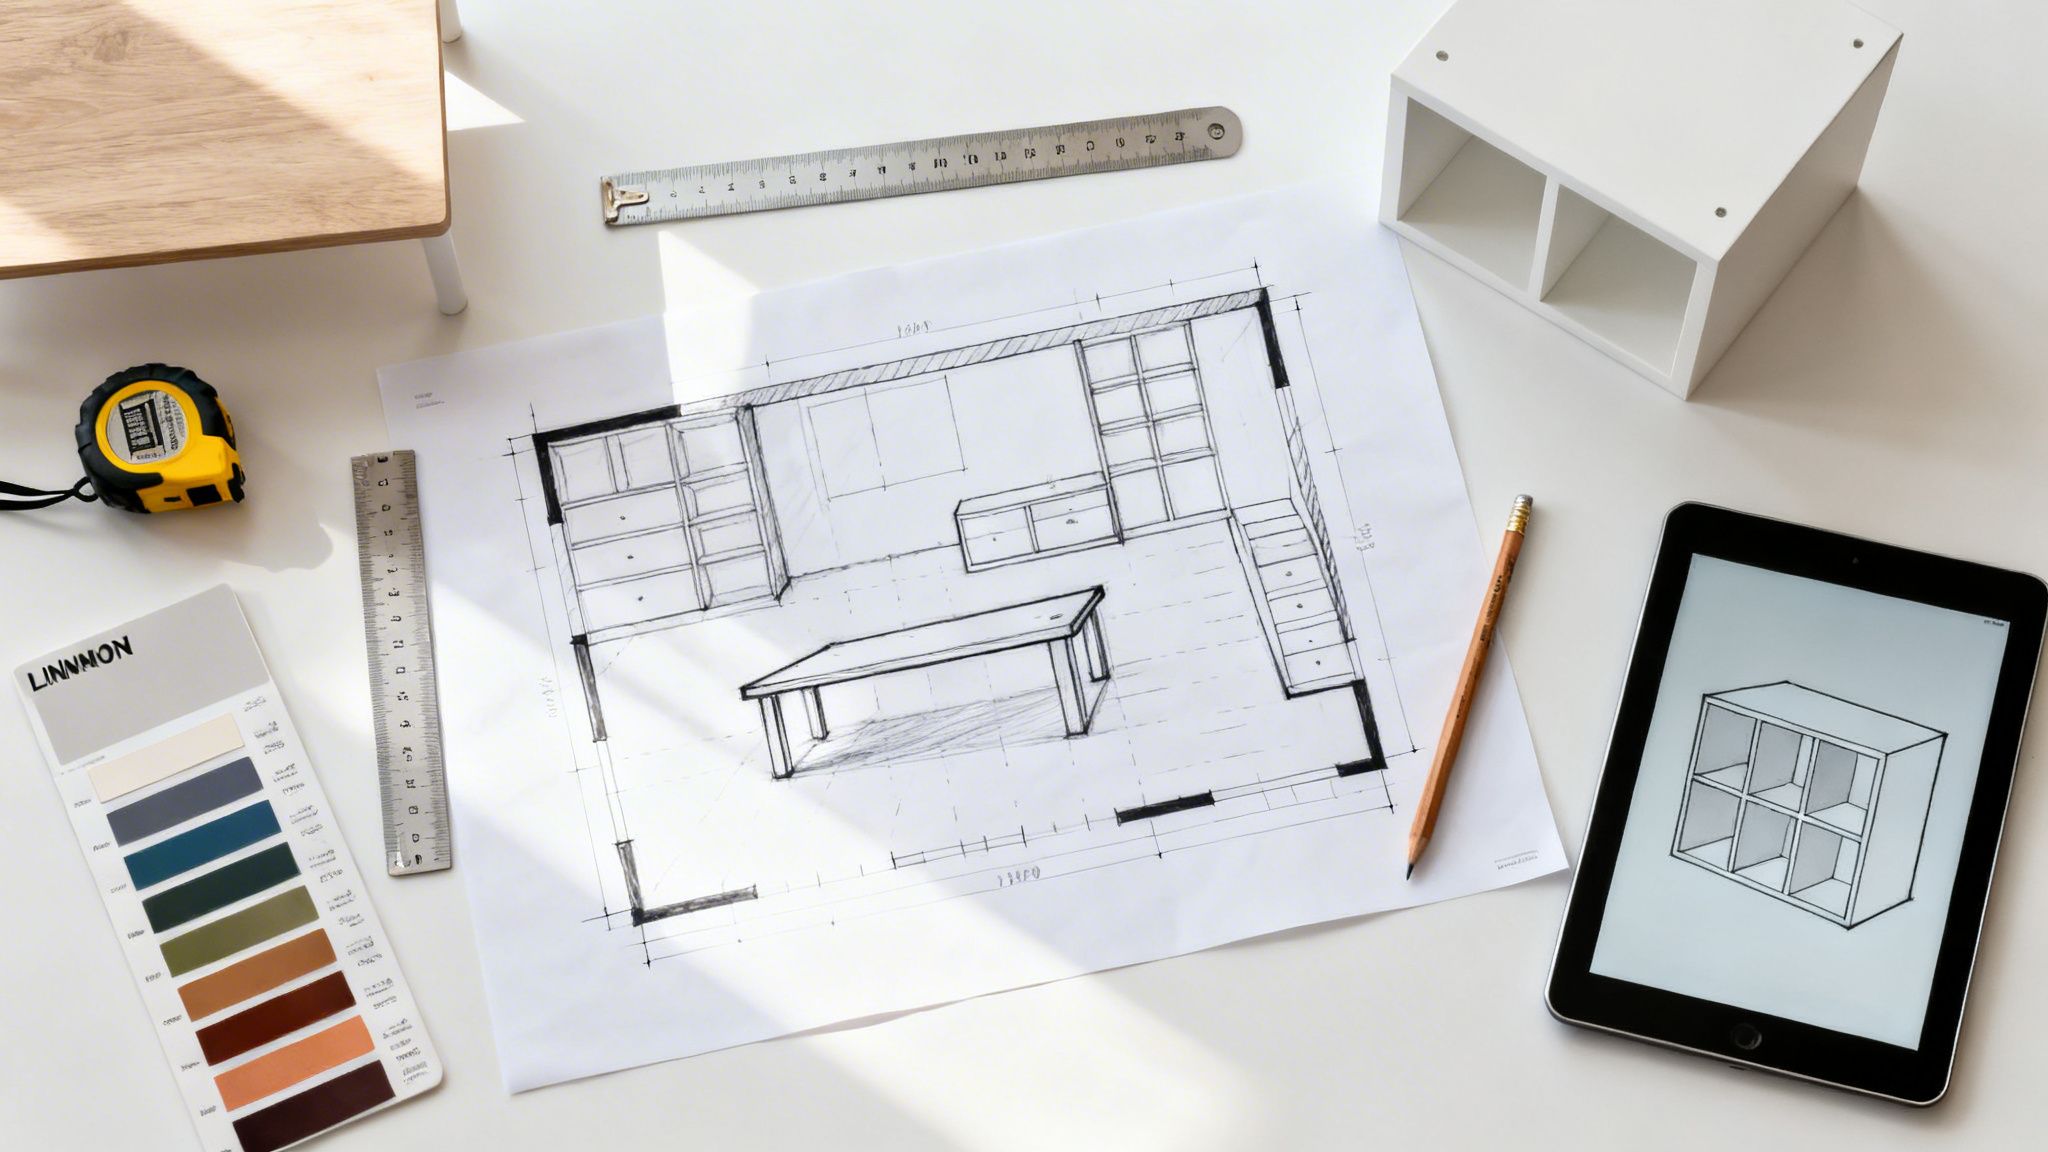
Before you even think about picking up a drill, let’s talk planning. I know it’s the less exciting part, but trust me, a good plan is the difference between a dream project and a DIY disaster. This is where you get to map out your vision and turn those brilliant ideas into something you can actually build.
First up, what’s the main purpose of the space you’re creating under the bed? Nailing this down will make all the other decisions so much easier.
- The Study Fortress: Is your little one starting school or just needs a quiet spot for homework? You’ll want to focus your design on a well-lit desk area with smart storage for books, pens, and paper. An example would be using a LAGKAPTEN tabletop and ADILS legs.
- The Play Den: For younger kids, the goal might be creating a magical hideaway. Think curtains, fairy lights, and a soft rug to build a cosy world for imaginative play. For a practical touch, use the LILL net curtains from IKEA which are cheap and lightweight.
- The Storage Powerhouse: If you’re constantly fighting a tidal wave of toys and clothes, then your priority is maximum storage. This could mean integrating drawers, shelves, or even a compact wardrobe right into the structure, such as fitting a PLATSA unit neatly underneath.
Measure Twice, Build Once
With a clear purpose in mind, it's time to get a bit more technical. Getting your measurements right is non-negotiable and will save you a world of frustration later. Grab your tape measure and get to know your space.
Don't just measure the footprint of the bed. The one thing people always forget is ceiling height. You absolutely must make sure there’s enough room between the mattress and the ceiling for your child to sit up comfortably without bumping their head. A good rule of thumb is to have at least 90cm (about 35 inches) of clearance.
While you're at it, map out where the windows, doors, radiators, and plug sockets are. There's nothing worse than finishing your amazing new desk setup only to realise it's blocking the only power outlet in that corner of the room.
Sketching Out Your IKEA Loft Bed Hack
You don't need to be an architect to bring your plan to life. Honestly, a simple sketch on a piece of paper can work wonders. Draw the bed frame and then start adding your custom elements.
For instance, if you're building a study nook, you could use an IKEA LINNMON tabletop cut to size and mounted on strong brackets for a cool "floating" desk. It keeps the floor clear and looks really sleek. If storage is your main goal, you could sketch out how two KALLAX 2x2 units could be used at one end, acting as both a support and a fantastic set of cubbies. This kind of multi-tasking is what makes a great IKEA hack.
The most successful hacks are the ones that look intentional, not like an afterthought. By figuring out how different IKEA pieces can fit together like a puzzle, you create a seamless, sturdy, and custom-looking piece of furniture.
Safety needs to be part of your design from the very beginning. If you’re creating an enclosed den, how will you ensure proper ventilation? Leaving a small gap or using breathable fabric for curtains can make all the difference. For more inspiration on combining storage and function safely, take a look at our guide on hacking IKEA TROFAST storage units.
Finally, use your sketch to write a ridiculously detailed shopping list. I’m not just talking about the big furniture items. List every single screw, bracket, hinge, and pot of paint you’ll need. For example: "1x LINNMON tabletop, 4x heavy-duty L-brackets, 16x 20mm wood screws, 1x pot of primer, 1x pot of Farrow & Ball 'Stiffkey Blue' paint". This small step prevents that dreaded mid-project run to the hardware shop, letting you enjoy a smooth, hassle-free build day.
Bringing Your Custom Loft Bed Hack to Life
With your design finalised, it’s time for the fun part: turning those sketches into a real, functional piece of furniture that your child will love. This is where the magic happens, transforming a standard loft bed into something truly special.
First things first, you need a solid base. Assemble the IKEA loft bed precisely according to the manual. I know it's tempting to jump ahead, but a correctly built frame is non-negotiable for safety. This is the foundation for everything to come.
The Foundation: A Solid IKEA Assembly
Building the basic frame first does more than just give you a starting point. It helps you grasp the true scale of the project within the room and provides a solid structure to measure your custom additions against, ensuring everything fits just right.
Before you even start, lay out all your pieces and check you have all the hardware. Follow the IKEA instructions to the letter – the bed's structural integrity is vital. Once it's built, give it a good shake. Does it feel sturdy? Are all the bolts tight? Sort out any wobbles now, before you start adding extra weight and complexity.
A Pro Tip: Paint Before You Build
Here's a piece of advice I wish I'd taken on my first project: if you plan on painting anything, do it before you assemble your custom additions. Trust me, painting a flat tabletop or the individual shelves of a KALLAX unit is far easier than trying to do it once they're installed.
Working with individual components laid flat prevents drips and lets you get a clean, professional finish in every nook and cranny. For example, if you're painting a KALLAX unit and the bed legs to match, paint all the KALLAX panels before assembly and paint the bed legs before attaching your custom desk. Just be patient and let everything dry completely before you start attaching your custom elements to the bed frame.
The Study Pod: Creating a Dedicated Workspace
Let's kick off with a classic ikea loft bed hack: the integrated study pod. It’s a brilliant way to carve out a dedicated homework zone without taking up extra floor space.
The main thing you'll need is a desk surface. An IKEA LINNMON or LAGKAPTEN tabletop is a great, budget-friendly choice that you can mount directly under the loft frame.
- Measure and Cut: First, get the exact internal width of the loft bed frame where you want the desk to go. Cut your tabletop to match for that seamless, built-in look.
- Attach with Brackets: Use strong metal L-brackets to fix the tabletop to the bed's legs. I'd suggest using at least two brackets on each side for real stability. Grab a spirit level – no one wants to do their homework on a wonky desk.
- Add Shelving: For extra organisation, you can add shallow shelves like the MOSSLANDA picture ledges on the wall just above the desk. They're perfect for holding books, pens, and little treasures.
The Storage Kingdom: Integrating KALLAX Units
If your primary mission is to conquer clutter, this is the hack for you. By integrating an IKEA KALLAX shelving unit, you can transform the space into a true storage kingdom.
This is a hugely popular modification, and for good reason. It doesn't just add a massive amount of storage; it also makes the entire bed structure feel incredibly solid. You're basically swapping out the standard ladder or end supports for a robust piece of furniture.
By integrating a KALLAX unit, you're not just adding shelves; you're fundamentally reinforcing the structure of the bed. It acts as a solid anchor, making the entire setup feel more robust and permanent.
The process is straightforward. Position a KALLAX unit (a 2x2 or 2x4 configuration usually works best) at one end of the bed, directly beneath the frame. You then securely fasten the bed frame to the top of the KALLAX using flat connector plates or mending brackets. This creates a single, unified structure. The cubbies are then a perfect match for our TidyCubs storage cubes, which can be used to organise everything from toys and clothes to school supplies. If you're looking for more inspiration, you might find our guide on hacking IKEA bunk beds for added functionality useful.
The Play Den: A Secret Hideaway
For younger kids, the space under a loft bed is a world of pure imagination. Turning it into a cosy play den is one of the simplest and most rewarding IKEA loft bed hacks you can do.
The key ingredients here are fabric and creativity. You'll just need a way to hang some curtains.
- Curtain Rails: A simple IKEA DIGNITET curtain wire or a RÄCKA curtain rod installed around the inside perimeter of the bed frame works perfectly.
- Fabric Panels: Go for fun fabrics that reflect your child’s personality. You can hem old bedsheets for a budget-friendly option or buy new fabric by the metre. Adding a little "window" cutout or a tie-back "door" makes it feel extra special.
- Make it Cosy: Finish the den with a soft rug on the floor, a pile of cushions, and some battery-powered fairy lights for a warm, magical glow.
The appeal of an ikea loft bed hack is undeniable from a financial perspective. These DIY projects are gaining traction across the UK, where the bed and mattress retail sector is projected to hit £733.7 million by 2026. A smart hack lets parents get so much more for their money. A basic IKEA loft bed at around £179 can be transformed into a complete study and bed combination for as little as an additional £70 in materials. That's a huge saving compared to buying a similar all-in-one unit, which can often retail for over £800. With recent figures showing that 28% of Brits delayed furniture purchases due to rising costs, these cost-effective solutions have never been more relevant. You can explore more data on UK bed retail market trends on IBISWorld.com.
Troubleshooting Common Build Challenges
Let's be realistic—no DIY project goes perfectly to plan. If you find the bed wobbles slightly on an uneven floor, just slide some furniture levelling shims under the legs to create a stable base before anchoring it to the wall. If your room is a non-standard size and a desk tabletop doesn't quite fit, don't panic. For example, if the internal width is 95cm but your tabletop is 100cm, you can always trim it down with a saw for a custom fit. A good quality drill, a reliable spirit level, and a sharp saw are the best investments you can make for this project.
Styling and Organising Your New Loft Space
Alright, the heavy lifting is done. You’ve built the bones of your ikea loft bed hack, and now comes the really fun part: making it a space your child will absolutely love. This is where you transform a clever structure into a personalised little world, blending your child’s personality with smart organisation.
This is all about the finishing touches that make the space feel truly theirs. It's not just about looking good; it's about creating a little haven that actually encourages them to keep it tidy.
Adding Personality with Creative Decor
Think of this new space as a blank canvas. The colours, textures, and lighting you introduce now will define the entire vibe.
- A Splash of Colour: A lick of paint can work wonders. You could go for a colour that matches the room's overall theme or, even better, let your child pick their absolute favourite. For a bit of creative flair, try painting just the inside of a den area or the new desktop surface.
- Decals and Wallpaper: I’m a huge fan of peel-and-stick wall decals. They’re a fantastic, commitment-free way to add character. Imagine stars on the 'ceiling' above the bed, a world map behind the desk, or a jungle scene inside their play den. You can even use peel-and-stick wallpaper to give a plain desk surface a pop of pattern.
- Lighting for Mood and Function: Getting the lighting right is crucial. For a study nook, a simple clip-on LED desk lamp like the IKEA TERTIAL gives great, focused light without eating up precious desk space. In a cosy den or sleeping area, a string of battery-powered fairy lights or some LED strips can create a truly magical atmosphere.
The best styling I’ve seen doesn't come from a huge budget. It comes from layering simple, personal things that tell a story. A string of their favourite photos, a treasured poster, or a soft, colourful rug can make all the difference.
As a quick recap, the infographic below shows the three core phases we’ve just gone through: putting it together, making your changes, and making sure it’s rock-solid.
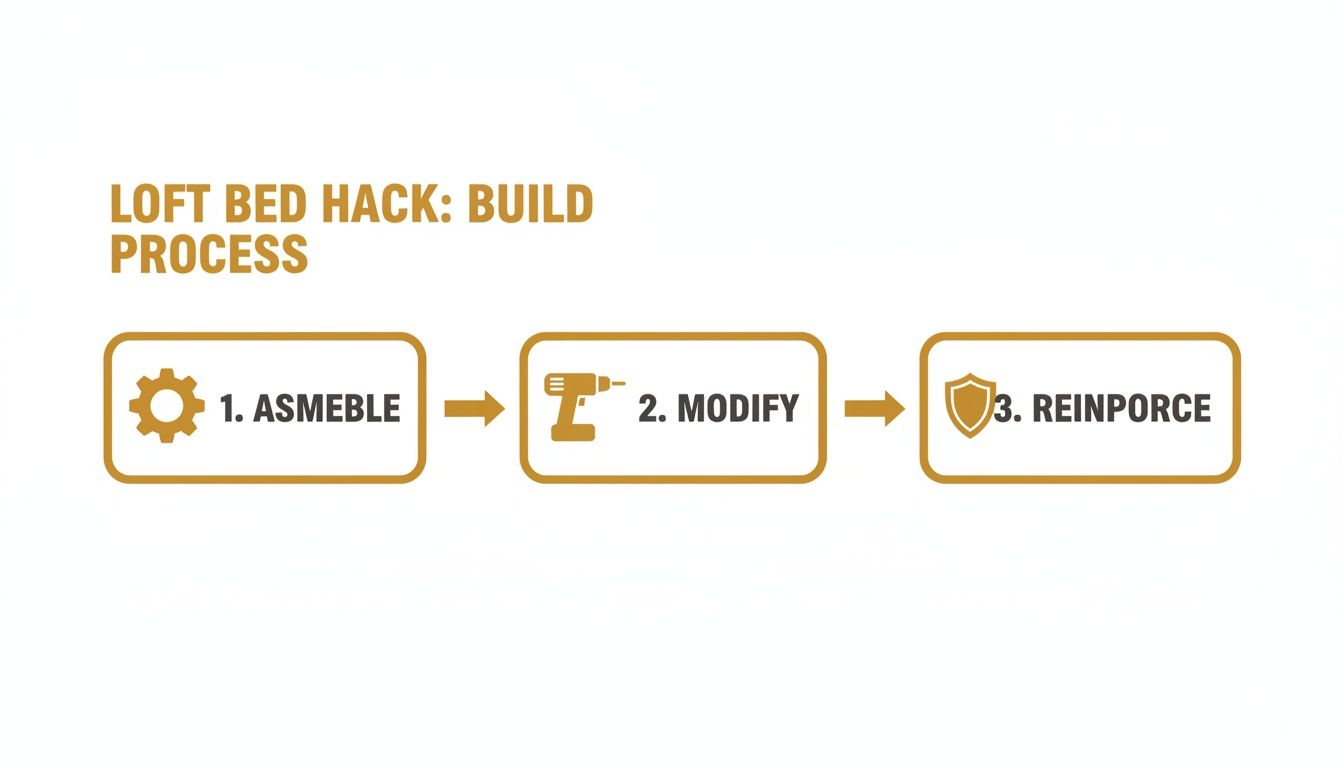
It’s a good reminder that a successful hack is a methodical process, not a rush job, which is what gives you that safe and sturdy final result.
Smart Storage Solutions for a Tidy Space
Now, let's talk about the secret weapon for keeping this new space organised: clever, accessible storage. The goal is to make it ridiculously easy for your child to put their things away. If storage feels like an afterthought, clutter will creep back in before you know it.
A classic problem is where to put all those little treasures, books, and bits and bobs kids seem to accumulate. They all need a home that’s easy to get to.
One of my go-to tricks is using IKEA’s BEKVÄM spice racks. They’re cheap, small, and made from solid wood you can easily paint. Mount a couple on the wall inside the bed frame, and you've got the perfect little library for bedtime stories or a display shelf for their favourite figurines.
Hanging storage pockets are another brilliant solution. You can just drape them over the bed's side rail, and they’re perfect for stashing away art supplies, action figures, or even a water bottle. A great example is the MÖJLIGHET bed pocket, which is designed for exactly this purpose. It keeps their essentials handy without cluttering up the mattress.
Integrating Storage with TidyCubs
For the bigger stuff, you’ll want to bring in some dedicated storage units. If you’ve built a KALLAX unit into your design, our TidyCubs storage cubes are literally made to measure, fitting perfectly into the shelves.
You can create a simple system by assigning a different coloured cube to each type of toy—one for LEGO, another for dolls, a third for art supplies. This visual cue is fantastic for helping young children learn how to categorise and tidy their own things. For more tips on this, take a look at our guide on using IKEA storage solutions for your playroom.
By weaving storage right into the DNA of your ikea loft bed hack, you’re creating more than just a stylish room. You're building a space that empowers your child to take ownership of their surroundings. It’s a true win-win: a beautiful, functional room and a great life skill learned in the process.
Making Sure Your Creation Is Safe for Play
Alright, the creative part is done, and your IKEA loft bed hack is looking fantastic. But before you let your little one scramble up to their new kingdom, we need to talk about the most critical part of this entire project: the safety check. This isn't just ticking boxes; it's about building something that's not only cool but completely rock-solid and secure.
Let’s walk through the essential checks that will guarantee your hard work results in a safe space for sleeping, playing, and dreaming.
Watch the Weight
It's easy to forget, but every IKEA bed has a maximum weight limit, and that's for a reason. This number isn't just your child's weight; it includes the mattress, bedding, and any friends who might pile in. When you start adding a desk, shelving, and all the books and toys that come with it, that added weight needs to be accounted for.
Think about the materials you're using. For example, a 140cm solid oak worktop used as a desk can weigh over 20kg, and a fully loaded KALLAX 2x4 unit can easily exceed 50kg. Do a quick mental tally of your additions to make sure you’re not pushing the frame beyond what it was designed to handle.
Anchor It to the Wall—No Excuses
If you only do one thing from this list, make it this. A freestanding loft bed, especially one with custom additions, can become top-heavy. Vigorous play or just climbing the ladder can create a tipping risk. Anchoring the bed to the wall isn't a suggestion; it's an absolute must.
You have to secure it directly to the wall studs—the solid wood beams that make up your home's framework—not just the plasterboard.
- Find Your Studs: Grab a stud finder and mark the locations of the vertical beams behind the bed.
- Use L-Brackets: Fasten at least two heavy-duty L-brackets to the upper part of the bed legs that sit flush against the wall.
- Get a Solid Fix: Drive long, sturdy screws through the brackets, through the plasterboard, and deep into the centre of the studs. This creates an unshakeable bond.
The ultimate test? Give the bed a firm shove. If there's any wobble or movement at all, your anchors aren't secure enough. A properly anchored bed will feel like part of the wall itself.
Mind the Gap: Guardrails and Mattresses
Those guardrails on the loft bed are your child’s primary safety barrier, but their effectiveness depends entirely on your mattress. IKEA is very clear about this, often marking a maximum mattress thickness line right on the bed frame.
Please, take this seriously. A mattress that's too thick can reduce the functional height of the guardrail to a dangerously low level, creating a fall hazard. For example, if the guardrail is 30cm high and the safety line is at 15cm, using a 20cm mattress leaves only 10cm of effective guardrail, which is unsafe. Measure your mattress and make sure there’s plenty of guardrail left above it to do its job.
Check for Ladders and Traps
Give the ladder a good once-over. Are all the bolts tight? Is it firmly attached? If your hack involved moving its position, make sure it’s still simple and safe for your child to use without any awkward angles.
Next, scan your entire build for any potential entrapment hazards. These are gaps where a child could potentially get their head or neck stuck. The danger zone for these gaps is between 5.5cm and 9cm. For instance, check the gap between the edge of your new floating desk and the bed leg. If it's 7cm, you need to close it up. Look for them between the bed frame and your new desk, or between the bed and the wall.
Your Job Isn’t Over: The Maintenance Check
A DIY project doesn't end the day you put your tools away. Over time, as the wood settles and the bed is used daily, bolts can work themselves loose.
Get into the habit of doing a quick maintenance check every few months. It only takes five minutes. Go around the entire bed and tighten every screw and bolt you can find. A practical example is to set a recurring phone reminder for "Bed Safety Check" every three months. Give it another firm shake to test the wall anchors. This simple routine ensures your IKEA hack stays just as safe as the day you finished it.
Common Questions About Hacking Ikea Loft Beds
Thinking about taking the plunge and hacking your first IKEA loft bed? It’s totally normal to have a few questions before you start. I’ve done a fair few of these myself, so let’s walk through some of the most common queries I hear from parents to get you feeling confident about your project.
Which Ikea Loft Bed Is Easiest To Hack for a Beginner?
If you're just dipping your toes into the world of DIY, my go-to recommendation is the KURA reversible bed. Its solid pine frame is a dream to work with. You can easily paint it, screw on some fun panels, or even just hang a curtain underneath to create a simple den. Best of all, its lower height makes it feel much less intimidating than a towering full-height loft.
For a more classic high-sleeper setup, the SVÄRTA metal frame is a solid choice. That open space underneath is practically begging for a desk to be slid right in. Just know that if you plan on attaching anything directly to the metal frame, you'll need proper metal drill bits and a bit more elbow grease.
And if you want a really polished, integrated look right out of the box, you can’t beat the SMÅSTAD system. It’s designed to be modular, so adding its matching wardrobes and desks feels completely seamless. It’s certainly a pricier option, but it takes nearly all of the structural guesswork off your plate.
How Can I Be Certain My Hack Is Safe and Stable?
This is, without a doubt, the most important question. Your child’s safety is non-negotiable, and it should be at the front of your mind from planning to completion.
If you take away only one piece of advice, let it be this: you absolutely must anchor the loft bed securely to a wall. Use heavy-duty L-brackets and make sure you’re drilling into the solid wall studs, not just flimsy plasterboard. A properly secured bed should have zero wobble.
Beyond that initial anchor, get into the habit of doing a quick check on all the bolts and screws every few months—they have a tendency to loosen over time with all that climbing and playing. Also, stick to IKEA's recommended mattress thickness. This ensures the guardrails are high enough to do their job properly. Finally, always be conscious of the bed's total weight limit, which includes the mattress, your child, and the weight of all your cool new additions.
Is It Possible to Paint a Laminate or Metal Loft Bed?
Yes, you can! But for these smooth, non-porous surfaces, success is all in the preparation. You can’t just slap a coat of paint on and hope for the best.
- For Laminate Surfaces: First, you need to give the paint something to grab onto. Lightly sand the entire surface with 120-grit sandpaper to scuff it up, then wipe away all the dust. Next, and this is a crucial step, apply a high-quality primer like Zinsser B-I-N Shellac-Based Primer. Once that’s fully cured, you’re ready to paint with your chosen colour.
- For Metal Frames: On a bed like the SVÄRTA, you'll want to start with a metal primer. This is key for preventing rust and making your paint job last. My pro-tip? Use spray primer and paint, for example from the Rust-Oleum range. It’s the best way to get a smooth, factory-like finish without any brush marks.
What Is the Best Way to Add Storage?
Adding storage is often the whole point of an ikea loft bed hack, and there are plenty of smart ways to do it without making the bed unstable.
One of the most popular and effective methods I've seen is to slide a freestanding shelving unit, like the IKEA KALLAX, underneath one end of the bed. It acts as both a bookshelf and an extra support, creating a really solid, built-in feel.
For lighter items, you can attach storage directly to the bed frame itself.
- Fabric hanging pockets are fantastic for stashing books, soft toys, and tablets.
- Believe it or not, IKEA's spice racks are brilliant when mounted on the inside rail for holding small treasures or figures.
- You can also add small, lightweight shelves with the right brackets.
Just remember to always be mindful of how much weight you're adding and double-check that every single thing is fastened securely.
By combining smart design with clever organisation, your hacked loft bed can become the highlight of your child's room. For more ways to bring colour and order to their space, explore the full range of personalised organisers and decor at TidyCubs. Visit us today and discover a world of tidy fun.